In this free tutorial we’re going to teach you how you can make $xxxx each day, promoting PPC car insurance offers from ClickDealer on Native traffic sources.
If you are not familiar with how Pay Per Call affiliate marketing works, let’s take a look at a simple example.
A typical affiliate flow goes like this, your visitor clicks on your affiliate link, they make a purchase or if it’s a lead generation offer they submit their email address, and you earn money for the sale or lead.
When it comes to pay per call offers, your visitor dial a unique phone number created for you, and you earn money after the phone call gets triggered.
You can find several pay per call offers if you search for them online, but the most profitable ones are hidden behind closed doors of a few cpa networks.
Based on our own experience with running and testing many pay per call offers, we can tell you that ClickDealer is one of the best CPA Networks for promoting these offers.

Most affiliate marketers are already familiar with ClickDealer, it is an award winning CPA Network with many popular and profitable pay per call offers, so we highly recommend checking them out.
[toc]
Choosing Pay Per Call Offers to Promote
When it comes to choosing your vertical and offer, we recommend contacting your affiliate manager no matter what networks you are working with.
Contact them, let them know your plans, what traffic networks you’re going to use, what is your target GEO, and they will help you with selecting the best offer based on your needs.
In this case we are going to run a campaign on native traffic sources and we want to target the United States. Based on that information our affiliate manager recommended an auto insurance pay per call offer, because it is doing very well on native now.
The offer is US only, Mobile only and the payout per call is $8 after the phone call gets triggered. So that’s exactly what we are going to do, promoting this offer with native traffic.
Finding Ads and Landing Pages That Convert
To find landing pages and ads that are proven to convert, we are going to use spy tools to see what is working for other affiliates who are running car insurance offers.
Since we are going to be running campaigns on native ad networks, Adplexity Native is the best spy tool for us in this case.
Once we log in to Adplexity, we need to filter results to see car insurance offers only. We can do this by simply searching for related keywords in AD info, such as ‘’car insurance’’ or ‘’auto insurance’’
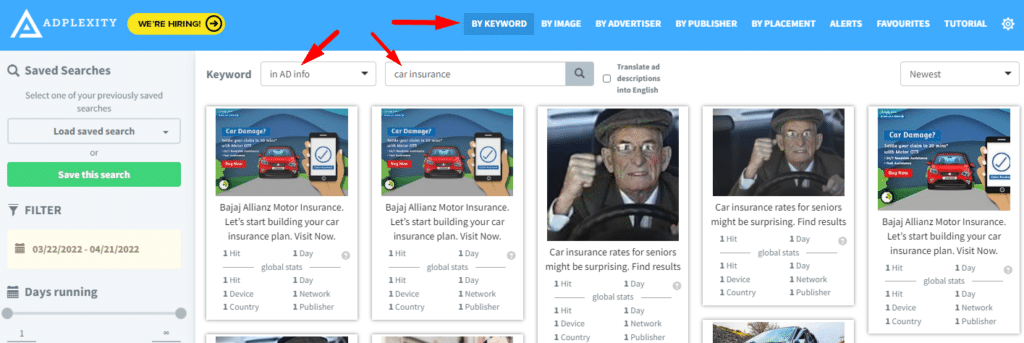
Next we recommend setting the date filter to last 30 days

Then we select the GEO we’re going to target, which is the United States in this case.

And finally to see the top converting campaigns only, we can sort the results by receiving the most traffic.

After that you can browse through the results to see what kind of ads and landing pages are the top campaigns using.
Here is an example:
AD:
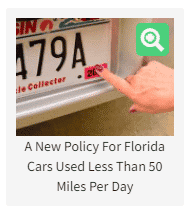
LANDING PAGE:

What you should do next is creating very similar creatives and ad copies based on the top performing ones. You can download the top landers from Adplexity, change the links, headlines and images to make it your own unique lander.
It’s always better to use unique landing pages, ripping and running is not working anymore.
Once you have your landing pages ready and uploaded to your server, the next step is setting up campaign tracking.
How To Track Your Campaigns Properly
In any kind of online marketing business, tracking ad campaign results is mandatory for success. Especially if you run affiliate campaigns, it’s super important to know where your profits and losses are coming from.
You need to see which ads, landing pages, placements, etc. are wasting your money and adjust your campaign based on that data.
For this you need to use 3rd party ad tracking software. There are many great trackers out there, but since we are tracking our campaign with RedTrack, we are going to show you how to set it up step by step.
If you are using other tracking solutions, don’t worry, the setup process will be pretty much the same.
The most important steps you need to take are: adding your landing page, cpa network, offer, traffic source, and setting up postback tracking.
Adding your landing page is easy, you just need to type in a name for your lander and enter it’s URL.

With Redtrack adding your CPA network is even easier because they have built in templates for all the major CPA Networks such as ClickDealer. So all you need to do is go to Offer sources, select add new from template, find ClickDealer and click Add.

After that you can add your offer. Go to offers click add new, type in the name of your offer, select ClickDealer as offer source, and add your unique affiliate link to in the URL box.

It’s very important to ensure your link contains the correct clickID parameter. With ClickDealer you need to send the ClickID in the s2 parameter, so your link needs to contain the following: s2={clickid}
After that you need to add your traffic source. Redtrack also has built in templates for traffic sources as well, so find your traffic network in the list and click add.

After that you can create your tracking campaign. Go to campaigns, click new, name your campaign, and select the traffic source.

Then create you funnel by selecting your landing page and offer

You can add multiple landers here and Redtrack will plit test them for you.
Then click save, and head over to the tracking links and parameters section and copy the Click URL, which is your tracking link, that is going to be your final URL on your traffic source.
Last but not least you need to add your Redtrack Postback URL to ClickDealer.
In Redtrack, go to tools, select conversion tracking and copy your Postback URL.

Inside ClickDealer, go to Tools and select Global postback.

Replace the ‘’{replace_me}’’ parts in your URL with ClickDealer’s tokens

Then place your Postback URL in the Global S2S postback box.

If you are not sure what you are doing, you can ask your affiliate manager at ClickDealer and they will help you set up your postback.
Once you have all this you are ready to launch your first campaign.
How To Launch a Native Campaign on RevContent
We chose RevContent as our native traffic source because according to Adplexity, this is the hottest traffic source right now for auto insurance offers.

To get started log in to your RevContent account and select Create a campaign boost.

Next you need to name your campaign, select bid type and amount and set your daily budget. I recommend leaving Pacing ON because it is going to force your campaign to spend your budget evenly to prevent spikes.

Then select Native as traffic type, select your target country and select Mobile only for device targeting (our offer is mobile only)

Pro Tip
Ask your affiliate manager at ClickDealer they can give you the best performing US states or Zip Codes, and you can target those only in RevContent.

Next you need to add your destination URL and you can upload your ads.

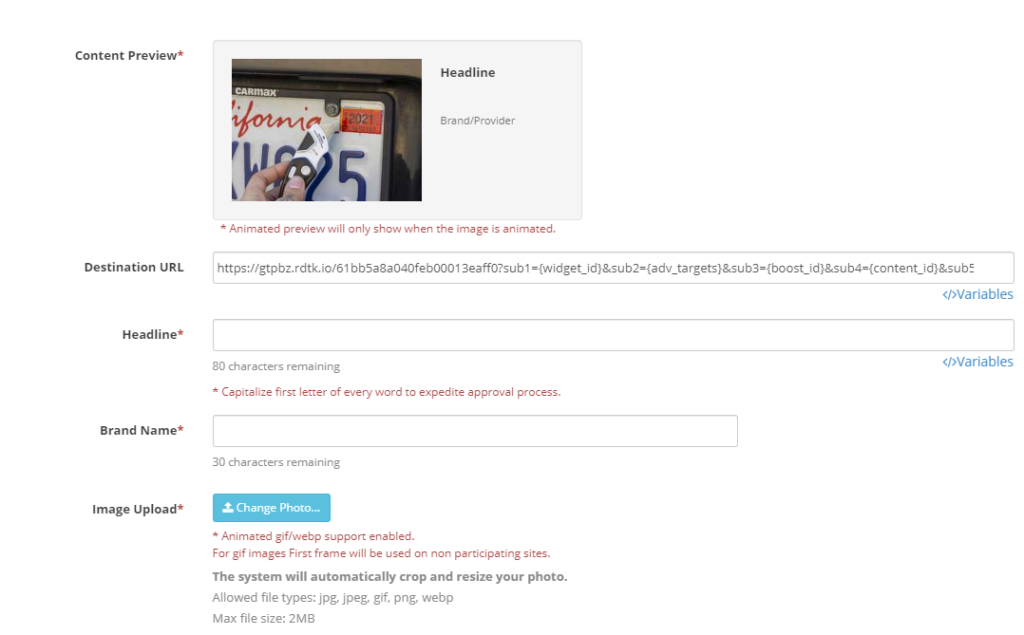
When you upload all your ads, click submit and wait for the approval team to review and approve your campaign, and that’s pretty much it.
Optimizing and Scaling Profitable Campaigns
Before you can start tweaking your campaign after it goes live, you’ll need to wait for some data to come in. It depends on your daily budget as well, however we usually wait 1-2 days to make sure we have enough data to optimize.
To begin the optimization, go to Redtrack, choose your campaign, and go to reports. I recommend starting with the placements (Widget IDs).
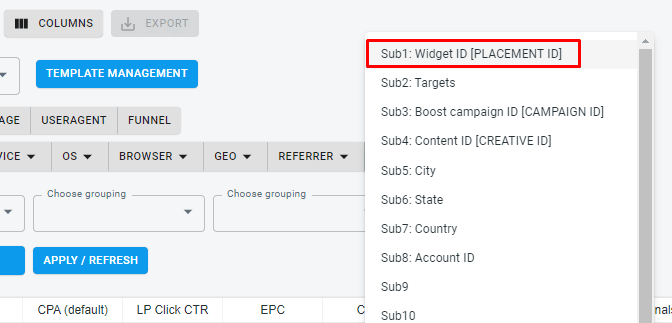
What we do here is we sort the placements by Cost, then we stop using any widgets that spend more than the offer payout without converting. To get rid of bad placements as quickly as possible, repeat this procedure every single day.
Next go to Landing page reports, and analyze the performance of your landers.

If you test 2 or more landing pages, analyze stats and compare the landers against each other. See which one has the highest CTR% (Click-Through-Rate) and which one got the most conversions.
The goal is, you want to end up using only one landing page, the best performing one of course. If you don’t see any significant statistics yet, don’t worry, just keep testing those landers for a couple more days, and you will see which one is the best.
After that you also need to keep an eye on your ads.
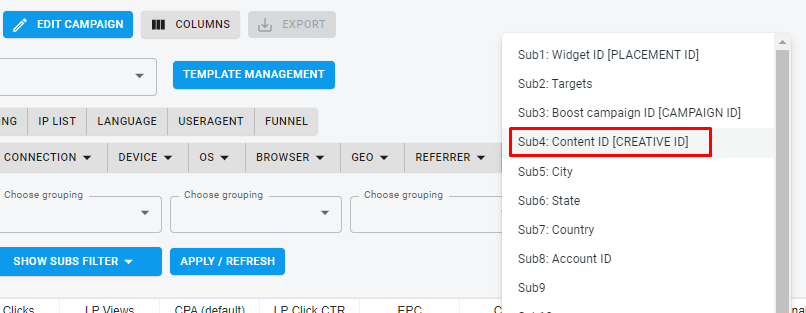
You need to watch your ads and see how they perform. There will be ads that are much better than the others, so you need to do the same thing with your ads as well, until you end up using only the best ones.
Once you find your winning ads, landing pages and placements, you need to start scaling. You can start with small adjustments like increasing your daily budget, and you can also try to increase the bids on your profitable placements.
When you do this, you must frequently monitor the performance of your campaigns to ensure that they remain profitable after the adjustments.
You should also create a ‘’whitelist’’ campaign, targeting only your very best placements, ads, and landing pages, and you can try to launch this campaign with a higher daily budget, since it’s most likely going to be profitable right away.
To scale your profits even further, try to launch the same campaign on other native traffic sources as well. Use the same landers and ads that are profitable on Revcontent.
Other Native traffic sources I recommend for this are: MGID, Outbrain, Content.ad


