PropellerAds has been in the business since 2011 and serve 650 million of daily impressions. The minimum deposit for starting a campaign is 100USD and campaign can only be approved if deposit is paid in advance.
Ad Formats
- Onclick pop-under ads – an Ad that pops up after the user clicks anywhere on your website. It pop ups in a new tab or window, depending on the browser). This is a full page graphic ad or lading page, but it will remain hidden behind your man browser window, until you close or minimize the main window.
- Mobile web ads,
- Baner ads,
- Direct Links,
- Video Ads.
Onclick pop-under ads – an Ad that pops up after the user clicks anywhere on your website. It pop ups in a new tab or window, depending on the browser). This is a full page graphic ad or lading page, but it will remain hidden behind your man browser window, until you close or minimize the main window.
Mobile web ads let you connect with mobile users in every location. There are two options with Mobile web ads – Mobile Dialog Ads which will take the client to a landing page or other link after dialog pop ups on client’s screen and. Mobile Interstitial Ads which are full screen ads on size 500×700 you will have enough space to present your marketing message.
Banner Ads – which is considered to be the most popular ad format in online advertising because it is considered to be reliable and simple.
PropellerAds offers most popular standard banner formats:
- 300×250
- 468×60
- 728×90
- 120×600
- 160×600
- 800×600
- 800×440
- 320×50
Direct Links – being an effective method to drive traffic where you need it, all you need to do is to provide a landing page URL. As an advertiser, you don’t need to create banner or other type of promo materials with this ad format. For example, if we were an affiliate marketing company who wants to promote products or promotion ofcompany “XY”, we would simply send our traffic to XY landing page or website, instead of sending them to our landing page or banner with specific offer of “XY” company.
Video Ads – short video message 10-30 seconds long which will run in front of the video content that user wants to see.
Pre-roll ad is promotional video that will play before the content that user wants to play.
Mid-roll video add will show during the video content that user is watching.
Post-roll will be displayed after the video content the user was watching.
Pre-games – a video add which will be displayed before a game.
CREATING A CAMPAIGN
STEP 1 – REGISTER
When you go on PropellerAdswebiset, first thing you need to do is to register.
https://propellerads.com/registration/
If you click on menu item “Register”, which you can find in top-right corner in the main menu, you will get options to register as Publisher or as Advertiser.
![]()
In this tutorial, we will register as “Advertiser”.

Next step will be entering your basic details in a form:
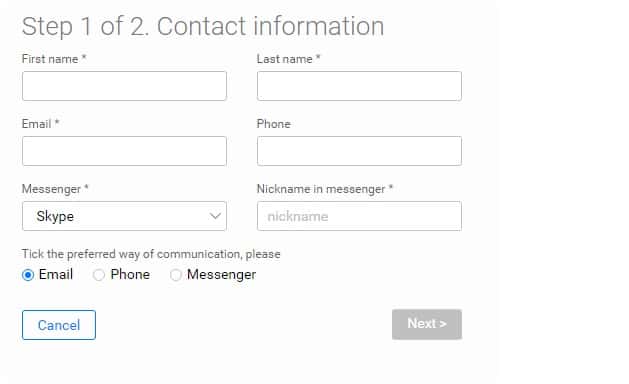
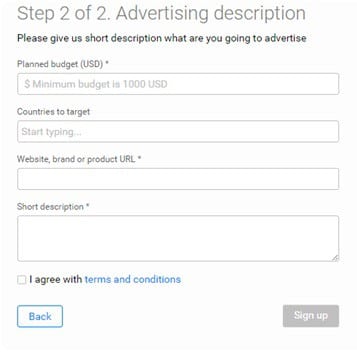
Once you fulfilled this form, you will be taken to the next step where you will enter details about campaign you plan to run with propellerads.com. Details which you will need to know are: planned budget for the campaign, countries which you plan to target with your campaign, your website or product and short description of the campaign. Once you enter these details, and agree with “terms and conditions” of propellerads.com, an email will be sent to you to confirm and verify your email address.
Once you successfully verified your email, next step is to create a password for your account. Make sure that the password is strong and unique. It is not advisable to use the same password for all your accounts. Also, make sure to include one special character in your password because otherwise, you won’t be able to save your password and continue.
STEP 2 – CREATE A CAMPAIGN
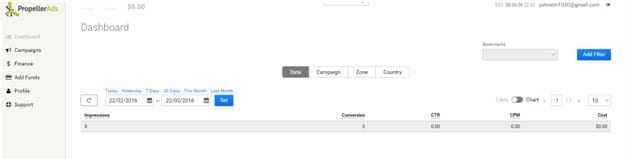
Now that you registered with propellerads.com, you will be redirected to your account.
Here you will be able to see details about your campaigns, finances, to add funds, change the details of your profile, and contact PropellerAds’ support.
But in order to explore these options, we will start creating a campaign.
STEP 2.1 – ENTER GENERAL INFORMATION ABOUT CAMPAIGN
When creating campaign, first you will need to enter General Information about your Campaign. In our case, we will call it WeightLoss Test.
Other parameters you need to determine, based on your own preferences, are frequency and capping. You can also choose the option to prevent capping, by clicking on “No capping” option.
When choosing country, good shortcut will be to “set from preset” in case you want to choose a set of countries(for exampleall European countries), by clicking on i.e. Europe.
In our case, we will target only one country – Norway.
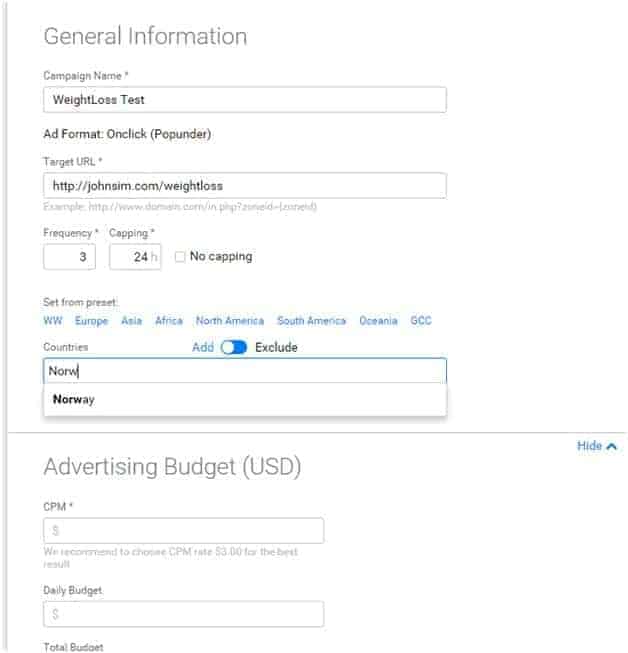
On the right-side of the screen, you will see a graphic display of total traffic available which is estimated based on parameters you entered about campaign.
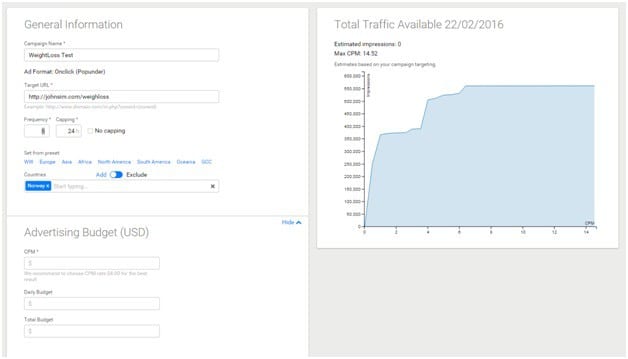
STEP 2.2 – SET ADVERTISING BUDGET
PropellersAds will recommend a certain CPM rate for you, based on your general information, which will bring you the best result. In this area you need to set Daily Budget, as well as Total Budget for your campaign. Total budget can’t be lower than your daily budget.
STEP 2.3. SCHEDULE CAMPAIGN

Next step is to Schedule your campaign. You can choose specific dates or set a certain period:
PropellersAds interface is again very helpful, giving you options to choose All days, or only working days, or only weekends.
You can also choose certain period of time if you want your campaign to run every day during some period of time.
STEP 2.4 – SET TARGETING OPTIONS
You can choose between simple and advanced targeting options.
Advanced targeting options give you more detailed choices, such as:
Target only clients that are connected through 3g internet connection, or only through Wi-Fi connection. But you can also choose the both options.
When choosing OS Type, you first get an option to choose whether you want to reach customers who are using Desktop, Mobile or Other. There is a possibility to choose all three options, or only two of those options, depending on your preferences.
Device Types:
- Phone
- Desktop
- Tablet
- TV
- Other
If you select “Other”, make sure you specify the device.
If you only want to exclude a small number of devices, you can enter those devices and select option “Exclude”

This option is available for other targeting option, such as OS Types, Device Types and Zone Limitations
Add funds – As an advertiser, you will have two options for adding funds – wire transfer and bank cards. Unfortunately, PropellerAds still doesn’t accept PayPal payments.
There is also a good option to Add or to Exclude your selected options:
![]()
If this button is blue, like in the above picture, all options you entered will be included in your campaign options. In case you choose to exclude something, this button will turn red and all the data you enter will be excluded. For example if you want to your campaign to be shown in all the countries in the world except Anguilla, switch on the Exclude button:

When you enter all the details for your campaign and hit the “Send to Moderation” button, you will probably get this message:

It is not possible to send a campaign to moderation if you don’t have any funds on your account. You can only save the campaign as Draft until you add the funds. Process of adding funds will be explained in next steps.
When you save your campaign as a draft, the campaign will be displayed in list of campaigns
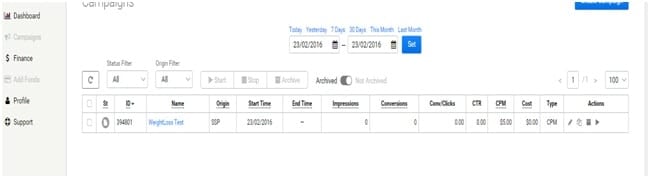
There you will have an overview about all the campaigns you started, running or campaigns you will run in the future.
Information you will find here are info about Campaign’s impressions, conversions, conversion/clicks, CTR, CPM, Costs…
In the last column, you have available actions for a campaign.
Available actions are Edit, Duplicate, Archive and Start Campaign which you access by clicking on certain icon:
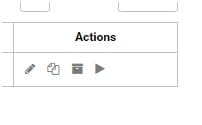
To edit a campaign click on ![]() , to archive
, to archive ![]() , to duplicate
, to duplicate ![]() , do start running a campaign click on
, do start running a campaign click on ![]()
REVIEW YOUR INVOICES AND EXPENSES
In section “Finance”, you have an overview of your invoices and expenses.

If you click on button invoices, you will have a preview of your invoices for campaigns. You can download every invoice in PDF format and search through documents by date or by invoice status:

Filter invoices by status: Failed, Success, Pending, Rejected or Processing

Filter invoices by date
STEP 3 – ADD FUNDS
To Add Funds, you need to select desired payment method:
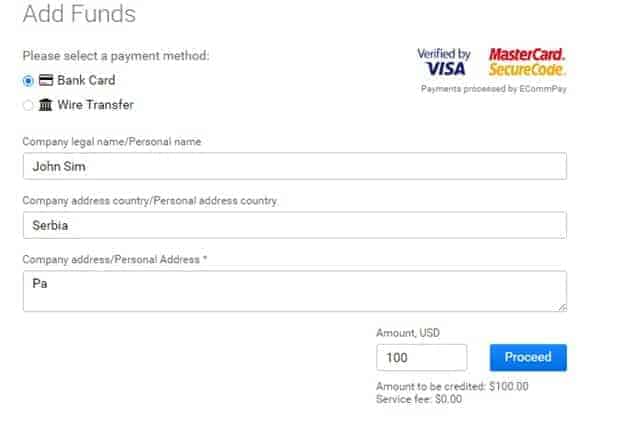
You can choose between Bank Card or Wire Transfer. After entering your details, click on Proceed button, and you will be asked to enter your credit card details (in case you chose option “Bank card”).
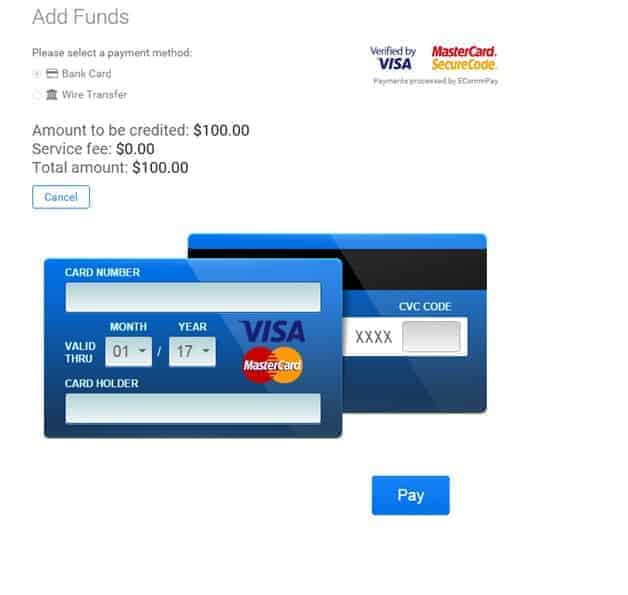
Once you enter your card details, you can click on button Pay and the amount you entered in previous step (amount to be credited) will be deducted from your card.
In case you choose option “Bank Transfer” you will need to contact PropellerAds support to complete the transaction.
Now you can run your campaign!
YOUR PROFILE
In Section Profile, you can always change your Personal Information, Password and Invoice Info for card payments and Notifications.
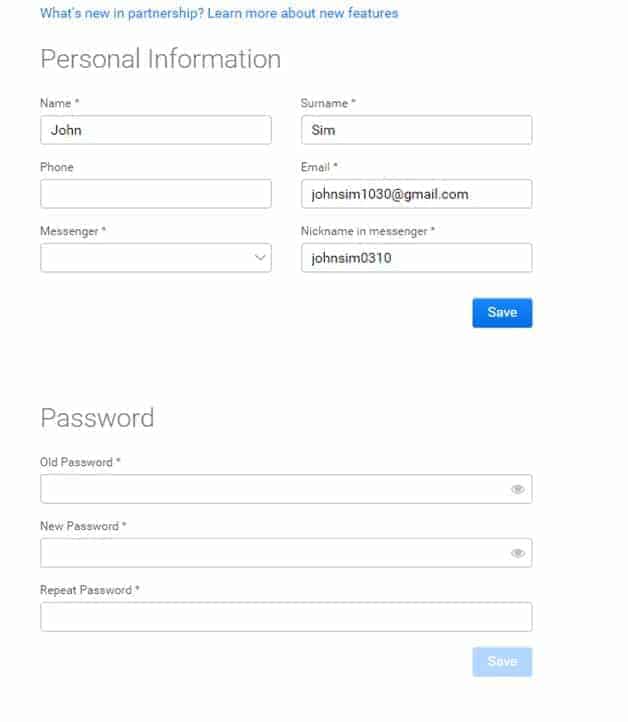
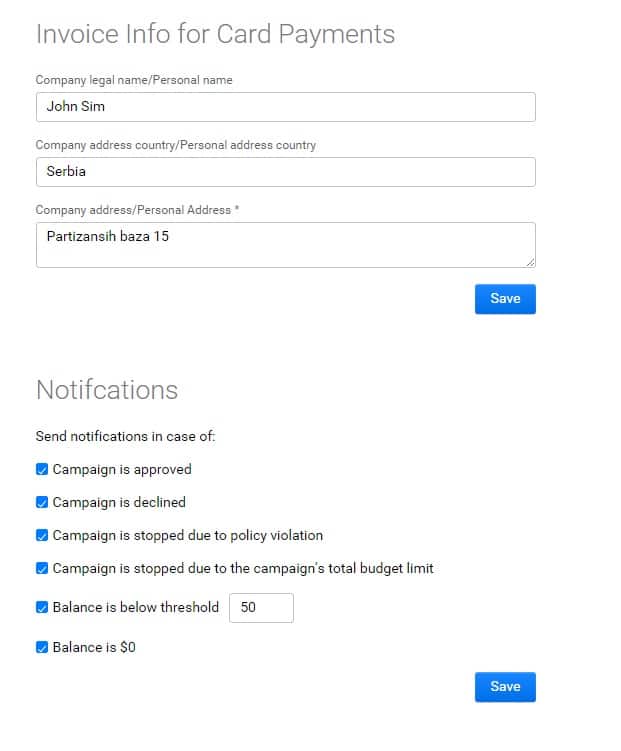
Don’t forget to click on button Save in case you make some changes!


2 thoughts on “Fast and Simple Guide to PropellerAds Campaigns”
Hello Mr.Attila .
Lovely Post as usual.Knowledge Volcano!
Any idea about the service fees that is being charged by propeller before adding funds.
Very detailed guide, thanks! As an alternative option I’d like to share with you smartyads programmatic company. They offer a lot of solutions and I’m getting very good results with my inventory.