
With Wiget, you can create Landing Page Ads which will be displayed as site-unders, pop-ups and mobile redirects.
CREATING CAMPAIGN
If you want to create a campaign, first you need to create a Campaign Group.
On the left-side of your panel, click on Create new and from drop down menu, first select Campaign Group.
Give your group a name, for example if you want to advertise products for Weigh Loss and you will run many campaigns in this niche, give the group name “Weigh Loss”
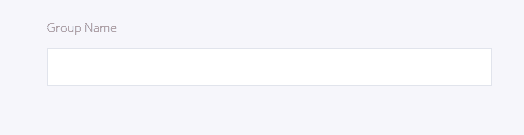
After that, click on Create Group button:
When your Group is created, you can start Creating New campaign.

Your Campaign will first need a name, so first step is to decide how to call your campaign. When you enter the name, you can select a group. In drop down menu, you will see the list of groups you created.
Status of campaign can be set on Active or Inactive.
Platform – you can choose between Desktop and Mobile, Desktop Only and Mobile Only, depending on which user’s platforms you want to target.
Start and End Date are dates where you plan to start and to end your campaign. Choose the dates from the calendar which will open up when you click on dropdown menu:

On the right side, you can see the option for Frequency Cap. This is the number of times your ad will be showed to one user, in 24 hours. You can set different parameters. Default is showing the ad once in every 24 hours.
Conversion Tracking
You can add a tracker to your campaign. You can add trackers in section “Manage Trackers” which you can find in drop down menu in the left sidebar which opens when you click on your name.

Value – Dollar value of conversion for the campaign you are creating. If you didn’t add trackers to your campaign, this filed disabled.
When you entered all these details, click on NEXT and you will be taken to a next section called Targeting.

In this section, you will specify your Geos, Devices, Operating Systems, Browser type, Days of week when your ad will be displayed, Carriers, Connections.
Geos – In this Section you need to specify your GEO locations.

If you start typing in search field, you will narrow down your selection.
When you choose your desired geo, your selection will turn green and you will see the list of geos you chose in the filed “Targeted”:

Devices – In section Devices, you can choose from many different devices. These are devices where you want to display your advertisement.
We will choose all the devices by ticking the checkbox next to search field:

Operating Systems – If you want to target only users who use Windows 8 Operating System, choose this OS. You can again choose all the operating systems, or you can choose only some operating systems, depending on your audience.

Browser – In this section you can choose browser in which you wish your advertisement to be displayed. If you exclude Safari browser, then you ad will not be displayed when browsing through this browser.

Days – Section in which you can choose days in week when you want your ad to be displayed. Think about days when it is more likely that your audience will be interested in your campaign. For example, if you are promoting event which happens on Sunday, it is probably good idea to display the ad for this in the end of the working week when people are probably planning their weekend activities.

Carriers – select only certain carriers that your audience uses, in order to target users of all carriers or only user of specific carriers.
Connection – select the type of connection your audience might use. I.e. if you don’t choose Mobile connection, your ad will not be displayed for users who use mobile connection.

Ads
Landing Page Ad
Create Landing Page for your campaign.

Insert the name of your ad, URL of your landing page. You can also use supported macros for defining your landing page. When you click on Macros, you will see the list of supported macros, such as {adID}, {campaignId}…
You can preview your landing page or remove with these tools:

When you click on Next, you will proceed to section Traffic Sources.
Here you can select desired traffic sources.
Options from which you can choose are RON, Placements, and Categories.

RON – Run of Network traffic source means that your campaign will be displayed on numerous websites from our network. You can also include your campaign to be displayed on websites with adult content.
Placements – Select placements for your campaign.

Categories – Run your campaign only on websites of certain Category: Apps and Extensions, Sport, etc.

Bids
In this section, you need to set CPM bid and specify details about your campaign’s budget.

Set the bid for your CPM, Daily Budget, Total Budget, and decide how to distribute Budget – ASAP or Evenly. If you choose ASAP (as soon as possible), your budget will be spent as soon as possible and if you decide to distribute your budget evenly, it will be spent evenly during the day or month, depending on setting of your campaign.

Now click on Create Campaign button.
Your campaign will be shown in the list of Campaigns.

You can edit, Duplicate, Report or Archive your campaign with these tools:

From the list of campaigns, you can change status of every campaign easily by choosing from dropdown menu that opens when you click on status:

Your campaign needs to be validated before you can start receiving traffic. Also, in order for campaign to run, you need to have budget. Available payment methods are: credit cards and bank wire.


1 thought on “Quick and Effective Campaigns with Wiget”
awsome post thanks man! so do you recommend this traffic source ?