
In this post we are going to look at the affiliate tracker by the name Voluum. I’ve used to use it for many years until one day they decided to jack the prices up 300%, that’s when I switched to RedTrack and been using them since.
In this review I am going to share with you details about Voluum, including the pricing, what types of other trackers are out there (ie: RedTrack, ClickMagic, AdsBridge, FunnelFlux and more) and how you can use it in your affiliate marketing to track sales and conversions and know where to attribute the visitors to.
Setting up a sweeps offer on Voluum + Cake Platform (ClickDealer)
*This guide assumed that you already have an account on ClickDealer (or another network that uses CAKE platform) and that you were approved for the offer you want to add to voluum.
If you haven’t yet signed up for an account click here; or if you haven’t yet been approved for the offer make sure you talk to your rep and take care of that before proceeding.
1) Login to Clickdealer HERE and click on Offers on the left
2) Find the offer you want to add to voluum and click on it
3) Once you clicked on it, a pop up should open up with the offer, click the Creatives tab
4) Look for the offer link and copy it (in my case offer link is https://cldapp.com/?a=14030&c=64375&s1= )
![]()
5) IMPORTANT: Click dealer is allergic to receiving SUBIDs from voluum via s1 token, so its important to modify the link so the end of it reads &s2=
like this: https://cldapp.com/?a=14030&c=64375&s2=
Copy the new modified link to clipboard!
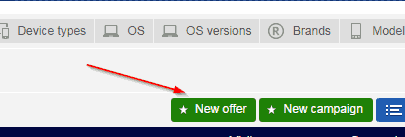
6) Go back to Voluum and click on OFFERS from the top menu bar

7) Click on NEW OFFER – the green button
8) Paste the link you copied to clipboard; in my case https://cldapp.com/?a=14030&c=64375&s2= into the URL field.

9) For the NAME field, type in the offer ID and the name they have on ClickDealer
10) For country, select the geo this offer is in
11) From the Affiliate Networks tab select ClickDealer (I assume you added your CPA Network already, if not follow the steps above under the section Adding your CPA Networks to Voluum)
12) For payout put Manual, and type in the payout your network gives you
13) Press SAVE when done
14) Next we are going to place the POSTBACK URl.
WTF is a postBack URL and why do I need it? When someone clicks your banners, they get a unique serial #, if that unique serial # results in a conversion, then the CPA Network will POST BACK that serial number to your tracker, so it knows to mark it as a conversion/lead – that’s what a PostBack URL is used for in a nutshell)
17) In voluum, click the gear icon on the top right.
18) Click the SETUP tab on top

19) Look for the PostBack URL down on the page, click the CLIPBOARD button to copy it to the clipboard
20) You should have something like this:
21) To keep it simple, we need to strip all the junk from this URL, and you should too – so you only have something like this: 
22) Next, we want to append the postback URL subID that CAKE uses; something we setup in step #5 – #s2#
Our PostBack URL should look something like this:
Copy it to the clipboard

23) Go back to Clickdealer, to the offer windows (I hope you didn’t close it) and click on Testing & Tracking tab

24) Under the testing&tracking tab paste your tracker link you copied in step #22 into the Postback URL (Server Pixel) field and then click SAVE.

25) We are done with this part, now postback URL has been placed so conversions will register in Voluum when they arrive in Clickdealer.
To continue we will be creating a campaign using Cake platform (through ClickDealer) and Voluum.
26) Click NEW Campaign and fill in the fields as follows:
-For Name put – Test 002
-Traffic Source: select the traffic source you added previously that you want to run this offer on
-Select the country for your offer
-Cost mode: Don’t track clicks (unless you want to, I personally don’t because I use an excel to calculate my costs/profits)
-Redirect mode: 302
-We aren’t using a lander, so click DIrect Linking check box
-From the drop down, select the offer, and press SAVE
27) After the new campaign is created, it will return the screen with a unique Campaign URL and highlight it in green. This is what you need when setting up the campaign on the traffic source!! Click the Clipboard icon to copy it to your clipboard. From there you should save it in a notepad or excel because you will need it when you setup on your traffic source.
28) Next, you have to login to your traffic source, create campaign, upload banners and use the Campaign URL we copied in previous step as your link where traffic will be sent to.
29) Now you know how to setup a campaign using CAKE and voluum from scratch, sweet 🙂
Time Saving Trick: Clickdealer and the CAKE platform has the option to set a master postback URL. This is a great time saver, because you don’t have to set a postback URL each and everytime then. Ask your rep, they usually can do it for you fast.
How to add Startapp traffic source to Voluum
How to add Startapp traffic source to Voluum in a few steps? Follow this short and simple guide and set-up your traffic source in minutes. There is an existing post that covers the dynamic tracking tokens/scripts/macros for Startapp right HERE. This guide will skip the account creation process and assume you already have a Voluum and Startapp account.
Step#1 Learn your traffic source, what is Startapp?
StartApp is a Mobile Advertising Platform aiming to deal with the two main concerns of the mobile industry today: the monetization challenge that application developers face when trying to generate substantial revenue from their free applications, and application distribution – earning a substantial number of downloads worldwide.
At the moment they work on CPC basis only. You can target by country, carrier, device type, category and maturity. They are working on additional parameters in the near future to ensure your campaigns are working on optimal levels.
If you are interested in what they have to offer, dive into their website and you might just find what suits your needs.
Step#2 Login to Voluum at www.voluum.com
Step#3
– Click the “Traffic sources ”tab and then on the “New traffic source” button”
Step#4 How to fill out the optional and necessary fields
After you have completed “Step#3” a new window will appear with many fields to fill out. The ‘Name’ field is mandatory and all the others are filled after you have made your first campaign with Startapp which will provide you with all the necessary links to place into Voluum tracking software.
In the screenshot below I will show you how this set-up should look like. Be advised, valuables and links used in this guide are taken from Startapp’s official web page and the tokens and postback URL can change depending on your campaign. For example you can only insert 1 or 2 tokens because your campaign doesn’t need more and your Postback URL can vary depending on the tokens you have inserted. You can edit these changes at any time.
Note#1 Every value in this guide is taken from Startapp’s official website. If you encounter any issues at all feel free to contact either Voluum or Startapp to find a solution for your problem.
Note#2 Since these values are taken directly from their site they are only examples on how should your set-up look like, these values will be provided to you from Startapp after you start making campaigns with them.

1) Type in “Startapp” or any desired name into the ‘Name’ field
2) Postback URL which we will be using in this guide is: https://www.startappexchange.com/trackinstall/hasoffers?d={externalid}
3) External ID and Custom variables are also optional fields but here is shown how to fill them up properly
Note#3 For You can get tokens used for Startapp by following this LINK!
4) When you are done with the fields click Save to finish and your new traffic source will be listed
5) You can make changes at any given moment by clicking the Edit button after selecting your traffic source from the list
CONGRATULATIONS! You have successfully added Startapp as your new traffic source to Voluum tracking software.
How to add Leadbolt traffic source to Voluum?
Do you want to know how to add Leadbolt as a traffic source to Voluum? Follow this short and simple guide and set-up your traffic source in minutes. There is an existing post that covers the dynamic tracking. tokens/scripts/macros for Leadbolt right HERE. This guide will skip the account creation process and assume you already have a Voluum and Leadbolt account.
Step#1 Learn your traffic source, what is Leadbolt?
Leadbolt is one of Australia’s fastest growing companies and world’s leading mobile advertising, user acquisition and monetization platform. Leadbolt is expanding rapidly across the world providing efficient methods for both advertisers and developers to promote their app and generate revenue for it. Leadbolt aims to deliver successful app monetization through a unified SDK that allows for traditional and advanced ad formats to be utilized. This approach makes it easy for advertisers and developers to connect to their mobile audience in non-intrusive ways. So check them out, they will be worth your time.
Step#2 Login to Voluum at www.voluum.com
Step#3
– Click the “Traffic sources ”tab and then on the “New traffic source” button”
Step#4 How to fill out the optional and necessary fields
After you have completed “Step#3” a new window will appear with many fields to fill out. Basically only the ‘Name’ field is necessary and all the others are filled as you get the info from your traffic source. In the screenshot below I will show you how this set-up should look like. Be advised, valuables and links used in this guide are valid but when you get to the point of making this on your own, tokens and links you would use will be different depending on what kind of conversions you wish to track. For example, you won’t need all of these tokens, maybe one or two.
Note#1 Every value in this guide is taken from Leadbolt’s official website. If you encounter any issues at all feel free to contact either Voluum or Leadbolt to get a solution for your problem.
Note#2 Since these values are taken directly from their site they are only examples on how should your set-up look like, these values will be provided to you from Leadbolt after you start making campaigns with them.

1) Type in “Leadbolt” or any desired name into the ‘Name’ field
2) Postback URL which we will be using in this guide is:
3) External ID and Custom variables are also optional fields but here is shown how to fill them up properly
Note#3 You can get tokens used for Leadbolt by following this LINK!
4) When you are done with the fields click Save to finish and your new traffic source will be listed
5) You can make changes at any given moment by clicking the Edit button after selecting your traffic source from the list
CONGRATULATIONS! You have successfully added Leadbolt as your new traffic source to Voluum tracking software.
How to setup Offers from ClickBank on Voluum
To be able to add your first offer you must have a ClickBank and Voluum account. To get your Voluum account go HERE.
What is ClickBank?
It’s one of the biggest, most popular affiliate marketing network on the net. If you dive into it you can find all sorts of products for all sorts of niches, price ranges are also vast. They have an amazing selection of products to promote with high commissions. ClickBank is extremely reliable with their on time payments. One of the best things is that anyone can join ClickBank as an affiliate because it’s free. One of the things that you need to know as a ClickBank affiliate is that you need to use a HOPLINK referral tracking URL to promote ClickBank products. To get a more detail insight about this system visit ClickBank’s support page.
After you have logged in into Voluum you can proceed following the guide below:
Add your new affiliate network

Step#1
2) Click on the “Affiliate networks” tab
3) Click on “New affiliate network” to begin
Step#2

1) Set a name for your affiliate network (I named it after ClickBank since we are going to use that network)
2) Check the box “Append click ID to offer URLs”, this will add a {clickid} to the end of your offer URLs
3) Click Save and your new affiliate network will appear in the list
Adding your first offer
Step#1

1) Click on the “Offers” tab
2) Click on “New offer” button to begin
Step#2

Note#1 – Input text in the Name field will change depending on the options chosen from the Affiliate network and Country menus.
Note#2 – If you wish to make changes to the fields, you can do so at any given time by clicking the Edit button.
Note#3 – If you want to track conversion it is required to use the {clickid} token in the URL field
Note#4 – All links used in this guide are taken from ClickBank’s official webpage.
1) Insert your desired Name for your offer (it can be anything)
2) Paste your offer URL from your affiliate network, as an example we used: https://3fed6f-ats2io901jwy5o6s9pq.hop.clickbank.net/?tid={transaction_id}{clickid}
3) The available URL tokens can be used to pass back information from your affiliate network
4) Country field groups your offers and landers into country groups. If nothing is selected, then “Global” will appear in the Name field
5) Choose your affiliate network from the drop-down menu (in this example: ClickBank)
6) If your affiliate network doesn’t have a payout token or you didn’t add the payout parameter to your postback or pixel URL, check “Manual” and enter your desired price
7) Click Save and your offer will be listed
How to add Exoclick traffic source to Voluum?
How to add Exoclick traffic source to Voluum in a few steps? Follow this short and simple guide and set-up your traffic source in minutes. There is an existing post that covers the dynamic tracking tokens/scripts/macros for Exoclick right HERE. This guide will skip the account creation process and assume you already have a Voluum and Exoclick account.
Step#1 Learn your traffic source, what is Exoclick?
ExoClick, a Barcelona-based company founded in 2006, has grown into one of the largest ad networks in the world, serving more than 125 billion geo-targeted ad views a month using EXADS™ ad-serving technology. ExoClick provides online advertising services to both advertisers and publishers worldwide, for both web and mobile channels.
The company offers a range of advertising formats for both web and mobile including display banners, in-video ads, popunders, customizable text ads, direct links, interstitials, instant messages and mobile redirects.
Advertisers have access to a global network of publisher channels from the entertainment, lifestyle, motoring, dating, games, online communities & tech/biz segments. Further targeting features include language, geo-location, browser, OS, device and mobile carrier and three types of retargeting are available.
ExoClick makes and accepts payments via Paypal, Payoneer, wire transfer and its partnership with Paxum allows payments to be made in the local currency of advertisers and publishers.
The company offers 24/7 customer service and a quality assurance unit checks for fraudulent activity of advertiser campaigns and guideline violations.
Step#2 Login to Voluum at www.voluum.com
Step#3
– Click the “Traffic sources ”tab and then on the “New traffic source” button”
Step#4 How to fill out the optional and necessary fields
After you have completed “Step#3” a new window will appear with many fields to fill out. Basically only the ‘Name’ field is necessary and all the others are filled as you get the info from your traffic source. In the screenshot below I will show you how this set-up should look like. Be advised, valuables and links used in this guide are taken from Exoclick’s official web page and the tokens and postback URL can change depending on your campaign. For example you can only insert 1 or 2 tokens because your campaign doesn’t need more. When you create your campaign on Exoclick you will be provided with a valid Postback URL for that campaign. You can edit those changes at any time.
Note#1 Every value in this guide is taken from Exoclick’s official website. If you encounter any issues at all feel free to contact either Voluum or Exoclick to get a solution for your problem.
Note#2 Since these values are taken directly from their site they are only examples on how should your set-up look like, these values will be provided to you from Exoclick after you start making campaigns with them.
1) Type in “Exoclick” or any desired name into the ‘Name’ field
2) Postback URL which we will be using in this guide is: https://main.exoclick.com/tag.php?goal=[GOAL_ID]&tag={externalid}
3) External ID and Custom variables are also optional fields but here is shown how to fill them up properly
Note#3 For You can get tokens used for Exoclick by following this LINK!
4) When you are done with the fields click Save to finish and your new traffic source will be listed
5) You can make changes at any given moment by clicking the Edit button after selecting your traffic source from the list
CONGRATULATIONS! You have successfully added Exoclick as your new traffic source to Voluum tracking software.
10 Step Guide on How to Scale a Working Campaign into Other Geos Using Voluum Tracker
Here’s a step by step guide on how to scale a working campaign from One geo to many other geos (assuming that the offer you are running is available in other geos).
You will need to pick the top two angles and top two images from your winning campaign. You can do the picking yourself, or your senior trusted media buyer – many of the other steps can be done by grunt labor/assistants.
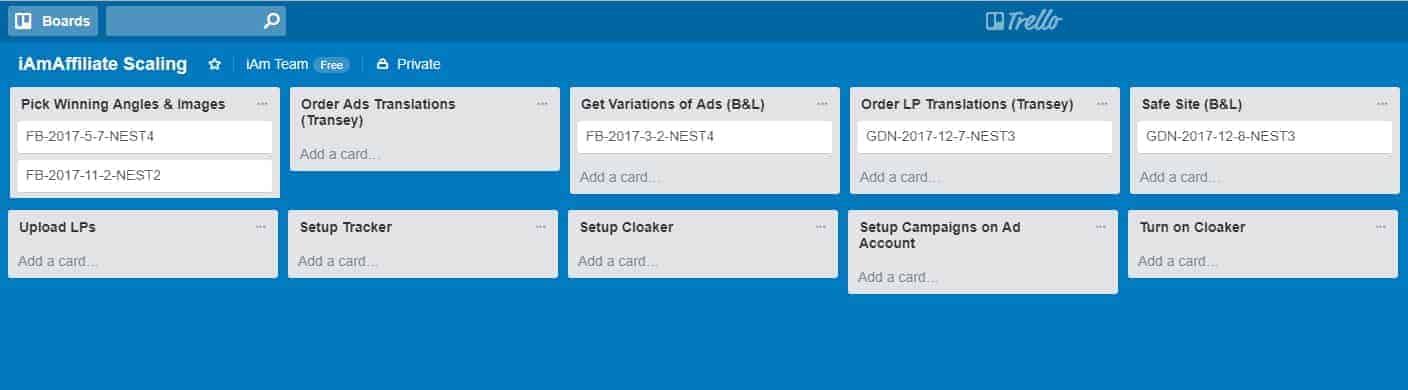
We use trello for the process, and people just move the cards along the production line like a factory. Here’s how our internal trello looks like (this is a mock up, of course I won’t screenshot our actual one with content)
Step 1 – Order translations for the winning angles in your target countries, you can get them cheapest at www.transey.com (half price compared to OHT)
Step 2 – Get variations made of your ad – not really a must but recommended (different color border, swap horizontal, other minor variants to have a different pixel footprint for safety reasons) – www.bannerslanders.com can help here or your VA!
Step 3 – Get the landing pages translated (transey) – we always run two of our best pre-landers, when the translations come in get the landers localized (changing the text, updating the images on lander in photoshop to be in the target geo language, also changing out logos/references to make sense when someone in the geo visits the lander, change people’s images/faces to that of the target audience – you want to make sure the right races show up in the right geos, etc otherwise you won’t have good enough LP CTR)
Step 4 – Get a safe site up for the geo, populate it with local articles, etc (Safe Site Creation Service)
Step 5 – Upload the pre-landers you had localized on the safe site via FTP
Step 6 – Setup the tracker campaign, make sure the postbacks (s2s) and cloaked pixel or tracking codes are properly placed. (Voluum)
Step 7 – Setup the cloaker campaign and test to make sure it works, after you are done, set it to deny all or in review.
Step 8 – Access the dedicated ad account you wish to run the new geo on (one geo per ad account!) and create your campaign, linking it to the safe article URL on your safe site.
Step 9 – Wait until it gets at least 20 clicks, then turn on cloaker
Step 10 – Observe and monitor the new campaigns
*Rinse n repeat for every single geo you wish to scale to.
How to build profitable campaigns and scale to $xxx,xxx per year with Voluum
Setting up a new affiliate marketing campaign might look easy to an outsider; they think, throw it up on a traffic source, optimize, profit BIG right?
I’m sure you agree; what they don’t realize is all the stuff that goes into launching a campaign; hell it’s made up of soooo many steps, requiring so much knowledge and experience that no wonder, most who try fail at this affiliate marketing game.
Million dollar per year campaigns can be made, but it requires systems. Charles Ngo talks about systems, all the time because he’s right – that IS the key to success.
So let me share with you my system and process of launching campaigns…a system made up of many steps…
Today we live in a very competitive time, where new affiliates are jumping in each day stealing our campaigns, it really is coming down to survival of the fittest.
That means, we need to be on our toes, launch more campaigns faster, and with bigger budgets.
This might sound impossible, especially if you are one man show, but with good organization and a few virtual assistants you can solve it – and I will teach you how easily really.
As My internal team grew it was time to get shit organized, so we could do more projects at the same time and not get lost in all the TO DOs.
We started using a tool that can help delegate tasks better, and also track how much each part of the project costs. To stay on budget, and on time.
There’s a shitload of tools out there to manage projects, unfortunately most seem to focus on freelancers where they charge by hours worked, and don’t offer the option to track all the little expense pieces that go into every campaign. Anyway…
Here’s the golden giveaway, my typical campaign process for a health campaign that is broken into tasks in my project management tool:
- Come up with angles (anglesaurus)
- Order landing pages (bannerslanders)
- Order banner or click bait fb images (bannerslanders)
- Order new safe site for cloaking (bannerslanders)
- Buy a domain name (namecheap)
- Buy a new hosting package with unique IP (bluehost)
- Setup the domain on the host (bluehost)
- Get link from CPA Network (Adcombo)
- Create campaign in tracker (voluum)
- Create new campaign in cloaker
- Setup cloaker code in safepage
- Grab the FB Pixel and or Adwords Pixels – establish different events in code
- Place the pixels in the safe site / landing pages
- Place the pixel with tne CPA network
- Test the flow with cloaker off/on
- Create campaign on Facebook or Adwords
- Wait for approval, and note down once approved – also note down if disapproved – solve issue
- Monitor voluum making sure clicks are coming in
- Monitor facebook and/or adwords pixel to see if its tracking properly and sending data back
- Look at the data, optimize as needed by stopping adsets/adgroups
- Increase budgets when there’s statistically significant data and SCALE $$$
This is a LOT to keep in your head, it’s a shit ton of post it notes on someone’s monitor.
Every element has a price, usually an estimated budget, and an actual cost. For example, when registering domains you can save some bucks by using coupons, so even though budget is $10 lets say, you can sometimes come in at $5 which is awesome.
With the project management tool we use now, the costs associated with each task in the project can be tracked, and it automatically ads it up.
Another awesome feature it has is TEMPLATING. So you can create a typical project flow, like I’ve listed above and save it in templates.
Let’s say we want to launch a SKIN campaign in US,UK,CA we can duplicate the template 3x, rename it so it looks like this
US Skin
CA Skin
UK Skin
and open each, then delegate all the tasks to our VAs and ourselves. And set deadlines, plus save all the required files, and/or login info all in one place so it’s easy to keep track of. And keep tabs on our budget, and or expenses.
NOTHING will be missed, everything will be done fast, and you will end up doing more in the same ammount of time than before. Very important, especially now when everyone wants to be an affiliate marketer so competition is fierce.

