In this guide I’m going to show you how to set up, launch and successfully profit from running ClickDealer home improvement lead gen offers like Window Remodel, Roofing, etc. offers on Taboola.
One of the most important things you need to have to be successful in affiliate marketing, is a good offer that sells!
If you promote a shitty offer no one cares about you never going to make it profitably no matter how hard you try.
That’s why I always choose ClickDealer especially when it comes to promoting Home Improvement and other lead generation offers.

ClickDealer is working with the best set of exclusive offers, they have competitive payouts, lucrative verticals, weekly payments and much more cool stuff.
So without any further ado, let’s get started!
[toc]
Watch tutorial as video:
Choosing the best Lead Gen offers for your traffic type
The first thing I always do is talking to my ClickDealer rep about my goals and traffic sources, so they can give me the top converting offers.
In this case I want to run Home Improvement Lead Generation offers on Taboola, so they suggested their Window Remodel and Roofing offers.
Window Remodel:
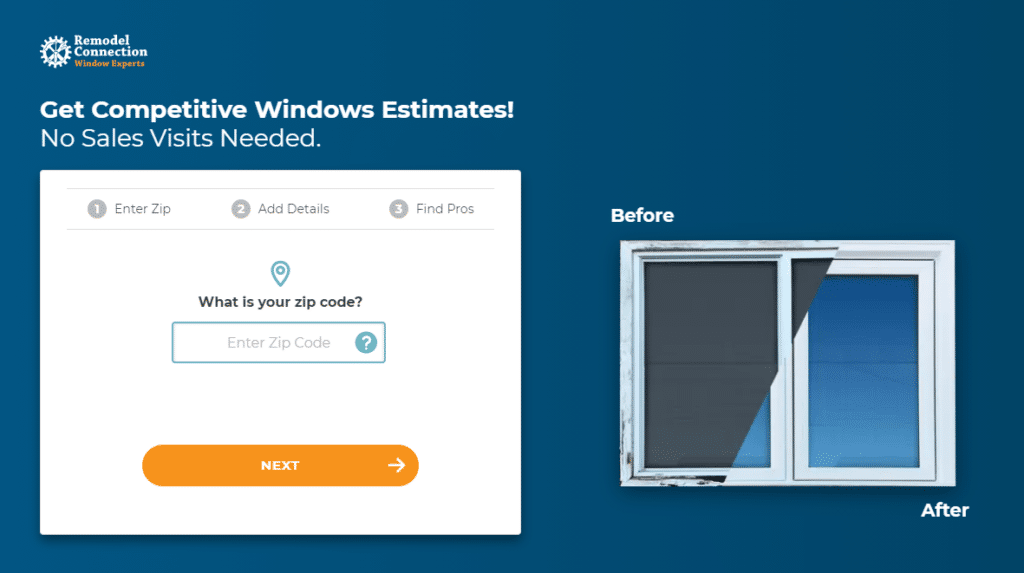
Roofing:

Both of these offers are USA only, so we are going to run these on Taboola targeting the United States.
Now that we have the offers and our unique affiliate links, it’s time to do some spying to find the top landing pages and ads.
Spying on the Top Performing Landers and Ads
The best way to find the best working landing pages, ad images and angles, is by using Spy Tools like Adplexity Native. A spy tool will let you spy on your competitors’ campaigns to see what landing pages and ads are running. Knowing these infos are very useful, it can save you from burning a bunch of testing money.
Adplexity is the number one Spy Tool, they have tools for all kinds of traffic sources, Native, Push, Pop, Display etc.
In our case we are going to use Adplexity Native since we are going to run campaigns on one of the best native traffic sources, Taboola.
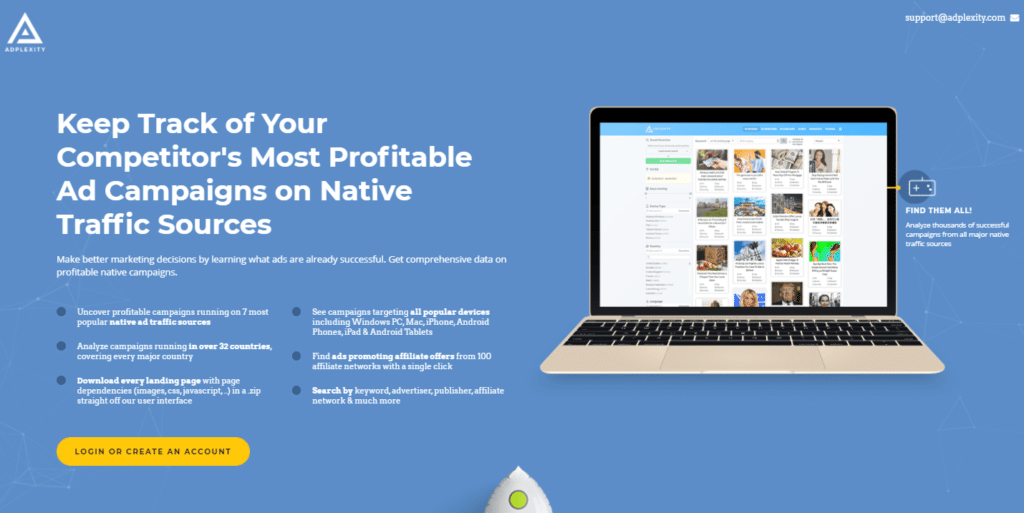
First let’s load up Adplexity and set the date filter to Last 30 Days.

Then let’s sort the ads by receiving the most traffic.

By doing this Adplexity will show you ads that received the most amount of traffic in the past 30 days. The reason I like to use this strategy is because these campaigns should be very profitable, otherwise they would not buy and send that much traffic to them.
Next to see only Window Remodel or Roofing ads we can type the keyword ’’roofing’’ for example in the search box, and search for that keyword on landing pages.

After that we can go through the top ads we find to see the top landing page and ads.
These are the top ads and landing pages right now:
ROOFING
AD:

LANDING PAGE:

WINDOWS REMODEL
AD:

LANDING PAGE:

Then you can create your own ad images and texts based on the top ones you see in Adplexity. You can also download these landing pages if you want by going to the landing pages section and clicking on the ’’Download This Landing Page’’ button.
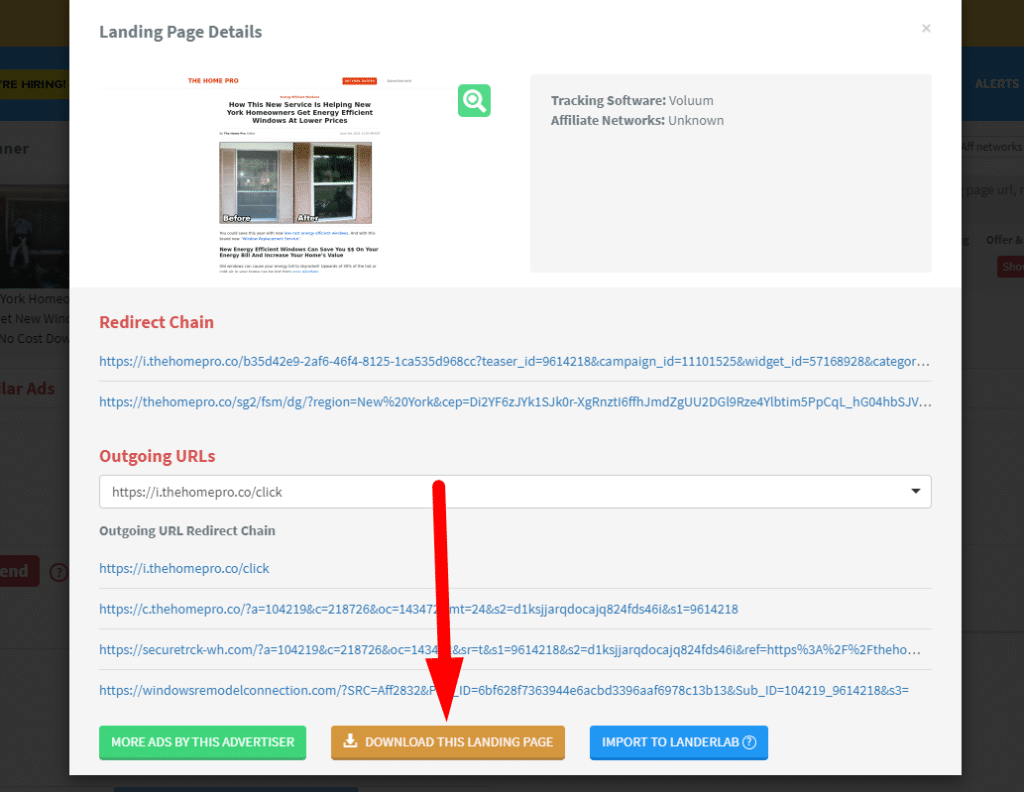
Then you should change the images and texts here and there, to make them your own unique landers.
Once you have your creatives prepared it’s time to setup campaign tracking with Redtrack.
Campaign Tracking Setup with Redtrack
This step is extremely important, you need to use a proper tracking software to track your campaigns and data. Without proper tracking, you will not receive important data which is necessary for optimizing your campaign for profits, so you basically burn money.
The #1 tracking software out there today is Redtrack.
Now let me show you how to properly set up tracking with Redtrack in a few easy steps.
#1 Add Your Landers
Once you have your landing pages ready and uploaded to your server, you need to add them inside Redtrack. Go to Landers in the top navigation bar and click +New

After that you need to type in the name and the URL of your landing page

That’s it!
#2 Add The Affiliate Network (Offer Source)
Next you need to add the Affiliate Network (Offer Source) you are working with, in our case it’s going to be ClickDealer.
Select Offer Sources and click on +New

Redtrack has pre-built templates of different affiliate networks, so all we have to do is find ClickDealer and click on Add.

Since they have a template for networks like ClickDealer, we don’t have to deal with setting up and adding the correct clickID to our offers and postback, everything is set in the template as you can see in the screenshot below.

#3 Add The Offers
Next you need to add the offers you are going to promote. Go to Offers and click on +New.

Type in the offer’s name, select the Offer source (ClickDealer) and insert your Offer URL, before the &s2={clickid} parameter.

Redtrack will add ClickDealer’s correct CLICKID automatically to your offer link so you don’t have to deal with that just simply replace the [insert_offer_url_here] text with your unique offer link.

#4 Add the Traffic Source
Then you need to add the traffic source. The traffic source is the traffic network where you are going to run ads. In this case it’s going to be Taboola.
Go to Traffic Sources and click on +New

Redtrack also has pre-built templates for traffic sources as well so all we have to do is find Taboola and Add it.

Now we have everything to create a Tracking campaign, so go to Campaigns and click on +New
#5 Create a Tracking Campaign
To create your first tracking campaign go to Campaigns and click on +New

Then first you need to name your campaign and select your traffic source (Taboola)

Then in the funnels section you need to select your landing page and offer

You can also add multiple landing pages and offers if you want, and then you can adjust the Weight and Redtrack will rotate and split-test them for you.

Then you need to save your campaign and that’s pretty much it. Next copy your campaign link from the campaigns section:

This is the final URL that you are going to promote on Taboola.
Launching Your First Campaign on Taboola

Taboola is one of the most popular Native Traffic Sources out there. They are well known for their high quality traffic, Taboola can drive targeted traffic in exclusive native placements on thousands of popular media sites.
Setting up a campaign is pretty easy and straightforward.
To get started, log in to your dashboard and click on +Create and select Campaign,

First you need to select your advertiser account, then type in your campaign and brand name and select a marketing objective (lead generation in our case).

Next is targeting, first let’s select the United States as our target country. My ClickDealer rep gave me a list of the top converting USA postal codes for my offer, so we are going to target those only.

Next I target Desktop devices only in this campaign, and then I create a new campaign targeting Mobile devices only. It’s important to create separate campaigns for each device type you want to target, because the bids are not the same, and you don’t want to overpay.

You can also target specific Operating Systems, Browsers etc. but for now I’m going to target all and then optimise later when I have enough data.
Next we need to set the daily budget and bidding. For this US Desktop campaign my bid is $0.65 and for mobile it will be $0.45, then once the campaign goes live and starts getting traffic I will drop the bids by 10 cents after 24 hours.

Then we need to set up tracking. Basically we need to copy and paste the tracking parameters from our Redtrack campaign URL.
So copy your Redtrack campaign link

Paste it in a notepad, and copy everything after the ? in the link

Then paste it in the Tracking code section in Taboola

Next we need to upload and create the ads on Taboola. You can upload your images and texts one by one, or you can use the Variations option which will automatically create more variations of your images and texts.

Now go back to the notepad where you pasted your Redtrack campaign link, and now copy everything that is before the ?

and paste it in the landing page URL box in Taboola

Next you need to add your headlines (ad texts)

Then upload your ad images.

And Taboola will automatically create ad variants from your images and texts, that you can see in the right sidebar.

Then click on save and submit your campaign for review. It usually takes 24-48 hours for the Taboola team to review and approve your campaign.
Checking Data in Redtrack
Once your campaign is launched and approved you need to go back to Redtrack and check the stats report of your campaign. Select your campaign and click on the Report icon.

To make sure everything works fine and you receive all the data you need, check the Subs menu and click on the dynamic variables (Placement ID, Creative ID, Campaign ID etc.)

This is very important, if you don’t see any data when you click on these Subs, something is wrong with your setup and you are not getting important data.
If everything is good, you should see something like this on Sub1 which is the Placement ID for example:

Then check the other Subs as well, the 3 most important tokens are Placement ID, Creative ID and Campaign ID.
Optimizing Your Campaigns
Optimising is very important, it basically means adjusting small segments of your campaig until it becomes profitable.
When it comes to Taboola campaigns, it’s important to test your Headlines. Keep monitoring them until you find the one that is much better than the others.
You can do this by checking the stats on the Creative IDs. Select your Redtrack campaign and click on the stats icon, then from the Subs menu select Creative ID.


Next I check the Placements by selecting Placement ID from the Sub menu.

Then I analyse the data, and if I see placements that are spending too much money without bringing results I cut them. For example a general rule of thumb is to cut placements that spend more than the offer payout without getting any leads.
So if my offer payout is $15 for a lead, I cut all placements that spend more than $15 and got no conversions.
Then I also check data on Device types to check which one of my campaigns are doing better, mobile or desktop.

Desktop was way better in my case.
Then I dive deeper into data, checking OS types, OS versions, Browsers, to see if I can find any significant data.


I realised that I got the most conversions and best results from Desktop Windows 10 devices and Chrome browsers.
So I edited my campaign, now I’m running Desktop only, targeting Windows 10 and Google Chrome browser only.
Scaling Profitable Campaigns
Once you find your profitable placements and your campaign becomes profitable, you should try to scale it as soon as you can to make more and more money.
You can try increasing the budget on your profitable campaign and see how it goes. You can also play with the bids, try to bid a bit higher to reach new audiences, or try to decrease them a bit and see if your campaign remains profitable or not.
Next you can simply grab your winning campaigns, with the same winning ads and landing pages, and launch them on other native traffic sources like Outbrain or Revontent for example.
In most cases it will work on other traffic sources too.
Conclusion
So in conclusion, you need a good Lead Generation offer in the first place. That’s why you should go with ClickDealer, they have the best converting exclusive lead generation offers.
Use spy tools like Adplexity Native to find what angles, landers and ads are working the best on Taboola. When creating ads, always test headlines first. Once you have your creatives, setup tracking with Redtrack, to be able to optimise your campaigns later.
When you launch on Taboola, always separate campaigns into Desktop and Mobile devices. Start with a bid of $0.65 on Desktop and $0.45 on Mobile. Then drop 10 cents after your campaign was live for 24 hours.


