TABLE OF CONTENTS:
- Introduction to Tracker
- All About RedTrack
- Getting Started with RedTrack
3.1 Setting up a Traffic Source on RedTrack - Setting up a Lander on RedTrack
- Setting up an Offer on RedTrack
- Setting up the Campaign on RedTrack (You are Here)
- Setting up a Domain on RedTrack
- Run-Through of RedTrack Series
Now that you got all the elements of the campaign sorted out, you can create a campaign and start the tracking process.
As usual, start by clicking the New button on the top left corner in the Campaigns tab.

This is the easy part, you just fill in the stuff we already created, well and a couple of other things. Let’s start by naming the campaign.
Select the source from the drop-down list as shown on the slide.
I added 2 templated traffic sources and our custom source to showcase how they appear in the drop-down menu.

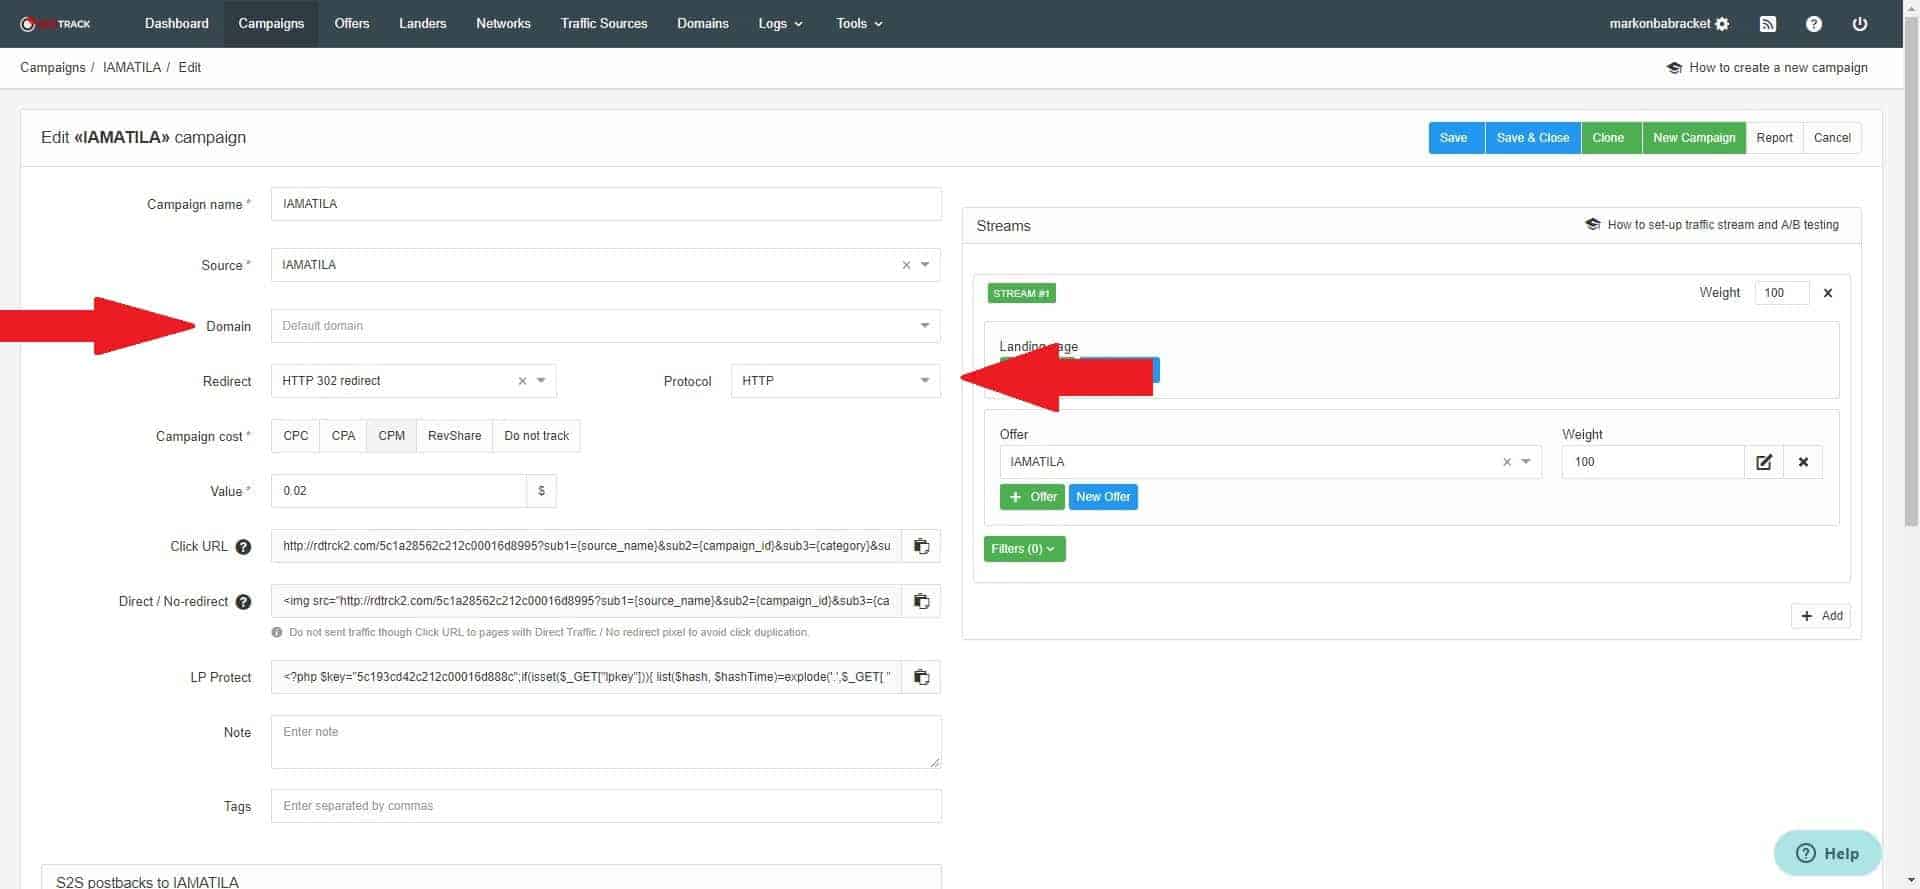
In the domain field, enter a custom tracking domain if you are using one. If you leave it blank, the default https://rdtrck2.com/ will be used. Select the appropriate redirect method and the protocol. If you are not sure which option to select, leave it as it is. HTTP 302 will send your audience directly to your offer and pass your data as the referrer. The protocol should be HTTP unless you have SSL applied to your custom domain, then switch it HTTPS.

Campaign cost field specifies the cost model used. Back at the start of the guide, I explained each model, you just now have to set it. Pay attention to decimal places in Value field just as you did in the offer setup.
Now you have to scroll down to postback settings, skip the click URL and Direct/no-redirect field as those will be generated after you save the campaign.

Notice that your postback has already been populated based on the traffic source you selected. You can add other postbacks if you are using different ones for the same campaign. If your affiliate network has pixel postback, you can add it in the section bellow.
Go back to the top right side of the page to set up streams for the campaign. Start by adding the offer. Select the offer you created from the drop-down menu. If you have multiple offers, you can add them all and select the distribution using the weight field.

Proceed with adding a lander if you created one. If you are not using a landing page, you can leave this section blank.
Check the validity of your data and click on the save & close button on the top right corner.

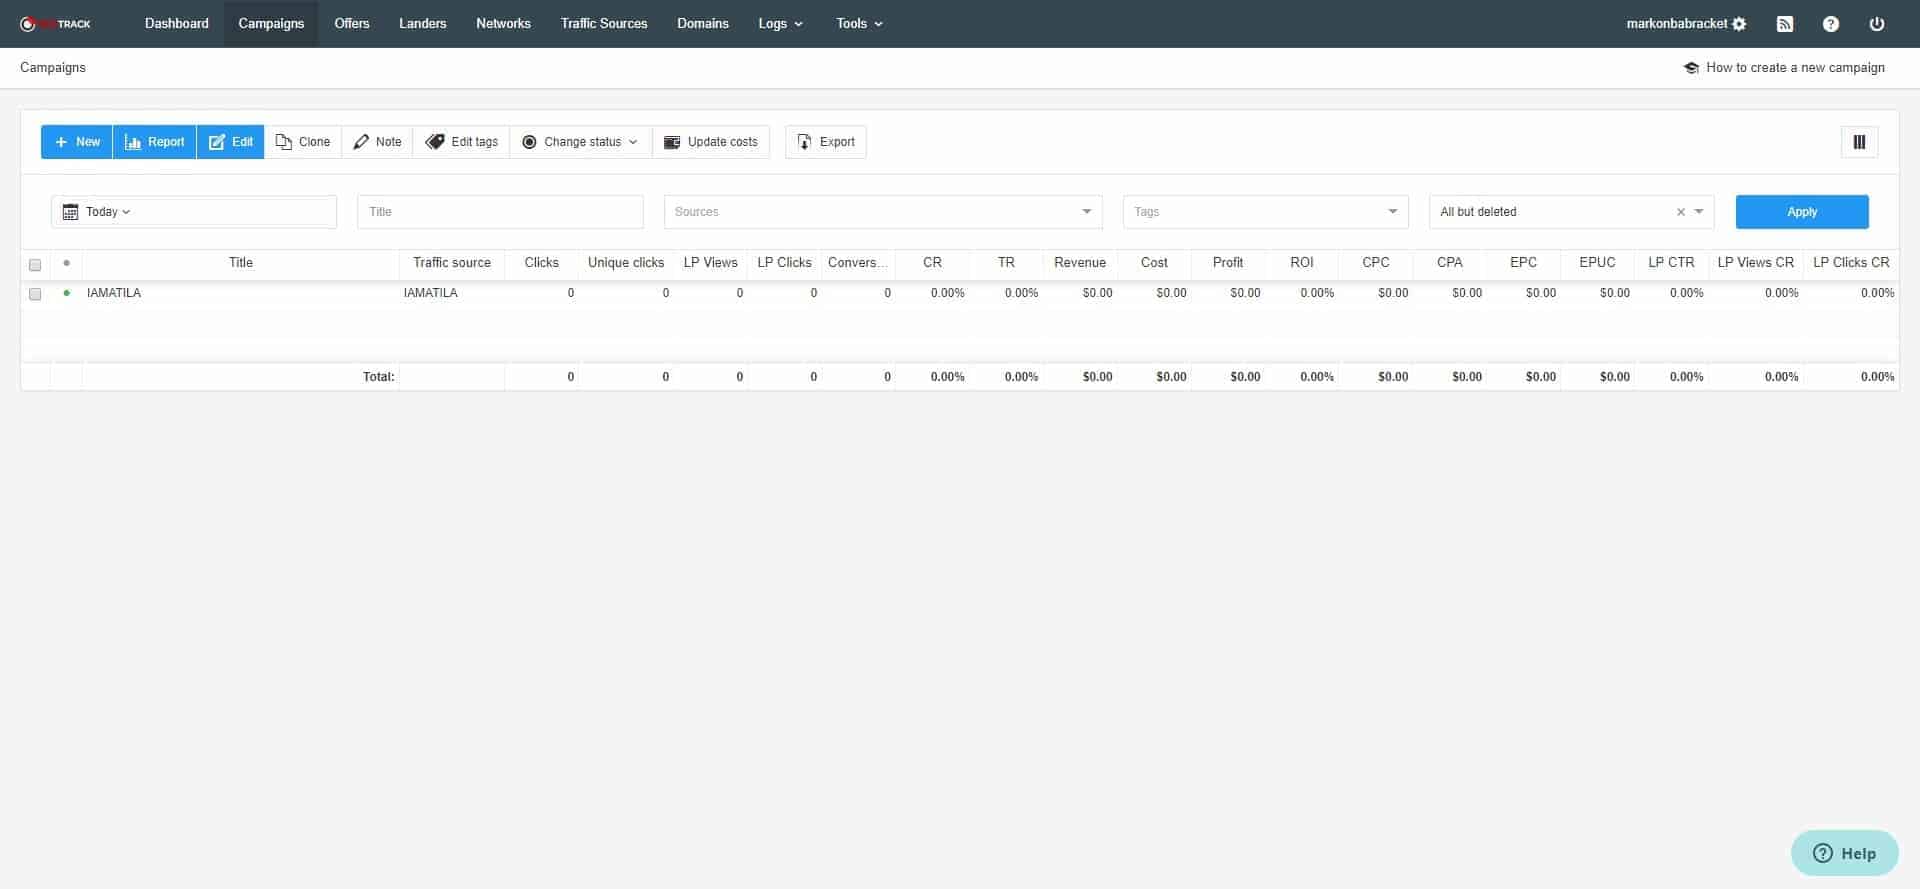
Here is what the Campaign tab should look like now

If you click on the edit button now, you will see that click URL and Direct / No-redirect fields are now populated. Copy this URL and paste it into the settings section of your traffic source campaign.

You are now set for tracking!!! You can create multiple campaigns and control their status, enabling and disabling tracking. You can also generate reports, make changes to your campaign tracking and control which aspects are shown in the table form.

- Introduction to Tracker
- All About RedTrack
- Getting Started with RedTrack
3.1 Setting up a Traffic Source on RedTrack - Setting up an Affiliate Network on RedTrack
- Setting up a Lander on RedTrack
- Setting up an Offer on RedTrack
- Setting up the Campaign on RedTrack (You are Here)
- Setting up a Domain on RedTrack
- Run-Through of RedTrack Series
